How to Run Own Stable Diffusion Undress Model
The article is of an educational nature, we do not call for or oblige to anything. The information is provided for informational purposes only.
Test Undress Web App Now – here.
The first step is to download all the necessary files:
1. Install Python (during the installation, check the box “Add Python to PATH”, if you get through, then you can fix it by setting the address through set PYTHON = in webui-user.bat), BE SURE TO PUT PYTHON VERSION 3.10.6. Work with other versions is not guaranteed.
2. Install Git, there are a lot of ticks and choices, do not touch anything, just click many times next.
3. Download the latest release of the shell for the neural network WEB-UI:
Option 1: Via GIT. Select the installation location (create a folder), click PKM, Git Bash Here, specifygit clone https://github.com/AUTOMATIC1111/stable-diffusion-webui
Option 2: manually place the downloaded folder with WEB-UI in the desired location (the final version takes about 10GB, keep in mind)
4. For any operations to replace, remove objects on any images according to the standard, a specially trained inpainting realistic image model is used. Any other models can also be used for similar operations, the main thing is to twist the sliders (and you can also freeze another model with inpainting, but more on this below).
And put (do not unpack) here: Stable-Diffusion\models\Stable-diffusion\
5. Open any editor in the root folder webui-user.bat. In this file, we will mostly only need one line of attributes.
Of the attributes at the first launch, only medvram/lowram and/or opr-split-attention are needed, the rest can be added on the next run, when you see that the grid is at least starting.–medvram
The grid is very sensitive to the amount of memory seen, so this attribute is mandatory for everyone who has a card of 4 GB and below.
If the card is 3 GB or lower, the network will most likely not start at all, but in this case, an attribute will help.–opt-split-attention
Thus, part of the resources will be taken from RAM, which will slightly reduce the speed of generation, but increase stability and startup. If you have a top map, then these attributes can be ignored.–xformers
An extremely useful attribute that installs a special plugin that speeds up the generation of images, but sacrifices the determinism of images (you do not need this, roughly speaking, two identical images with the same seeds will be slightly different in some details). Increase the generation rate from 20 to 50 percent compared to the baseline speed.
How to install xformers:
–reinstall-xformers –xformers
- Wait for installation, start of the network
- Close network
- Remove –reinstall-xformers, keep only –xformers
The plugin works with cards from GTX 1050 and above.–autolaunch
When the neural network starts, a local host is generated and a link is given to go, this command itself opens the interface in the browser (by default) after launch.–gradio-img2img-tool color-sketch –gradio-inpaint-tool color-sketch
Extends the functions of masking. For example, you can force the pull generated to turn away from the camera by drawing a black circle on your face. Or make glare on the body with a white mask. Or make a cat. Or mask with contextual color so that the mask does not catch the eye much. And much more.
As a result, the line of attributes will look like this:

Useful attributes for processors
This is what webui-user looks like.bat if there is not enough video memory on the view (right-click on webui-user.bat, delete (optionally back up) everything and paste this):@echo off set PYTHON= set GIT= set VENV_DIR= set COMMANDLINE_ARGS=–skip-torch-cuda-test –precision full –no-half –lowvram –opt-split-attention set PYTORCH_CUDA_ALLOC_CONF=garbage_collection_threshold:0.6,max_split_mb:128 call webui.bat
Runs purely on the processor (vidyaha ancient nvidia on 1GB) On the i5-3450 processor – one photo takes 15 minutes (50 frames), so choose fast euler or Euler a samplers and put 10 frames for testing.
Run webui-user.bat in the root folder. The script will begin to download everything you need (personally, it took me about half an hour), plus keep in mind for the future that during use you may need to download something else (for example, in the upscaler tab, they are all downloaded separately), it will download there itself, do not rush, do not touch anything and just wait, you can look at the command line to see what is happening there.
At the end of the download, a message with an IP address will appear in the console, open it in the browser – the interface itself is located there. Or it will open itself if the autolanch argument is spelled out.
If the network does not start and you have VPN enabled, then disable it.
How to Use the Networking Inpainting Method
To get started, check that the required module is loaded on the top left in the Stable Diffusion checkpoint box, in our case it is sd-v1-5-inpainting.
Next, go to the img2img tab, there are two subtabs img2img and Inpaint.
Img2img is used for contextual image-based generation without the use of a mask, Inpaint using a mask. You need to choose Inpaint.
On top there are two fields Prompt and Negative, in the first you need to write commands that the neural network should use, in the second what it needs to avoid. Without filling in the second field, 99% of the images will be shit.
To reduce the brain flow, simply insert into the second field:deformed, bad anatomy, disfigured, poorly drawn face, mutation, mutated, extra limb, ugly, poorly drawn hands, missing limb, floating limbs, disconnected limbs, malformed hands, out of focus, long neck, long body, monochrome, feet out of view, head out of view, lowres, ((bad anatomy)), bad hands, text, error, missing fingers, extra digit, fewer digits, cropped, worst quality, low quality, jpeg artifacts, signature, watermark, username, blurry, artist name, extra limb, poorly drawn eyes, (out of frame), black and white, obese, censored, bad legs, bad hands, text, error, missing fingers, extra digit, fewer digits, cropped, worst quality, low quality, normal quality, jpeg artifacts, signature, watermark, username, blurry, (extra legs), (poorly drawn eyes), without hands, bad knees, multiple shoulders, bad neck, ((no head))
Or:
lowres, bad anatomy, bad hands, text, error, missing fingers, extra digit, fewer digits, cropped, worst quality, low quality, normal quality, jpeg artifacts, signature, watermark, username, blurry, poorly drawn hands, poorly drawn limbs, bad anatomy, deformed, amateur drawing, odd, lowres, bad hands, text, error, missing fingers, extra digit, fewer digits, cropped, worst quality, low quality, normal quality, jpeg artifacts, lowres, bad anatomy, bad hands, text, error, missing fingers, extra digit, fewer digits, cropped, worst quality, low quality, normal quality, jpeg artifacts, signature, watermark, username, blurry, poorly drawn hands, poorly drawn limbs, bad anatomy, deformed, amateur drawing, odd, lowres, bad hands, text, error, missing fingers, extra digit, fewer digits, cropped, worst quality, low quality, normal quality, jpeg artifacts, lowres, bad anatomy, bad hands, text, error, missing fingers, extra digit, fewer digits, cropped, worst quality, low quality, normal quality, jpeg artifacts, signature, watermark, username, blurry, poorly drawn hands, poorly drawn limbs, bad anatomy, deformed, amateur drawing, odd, lowres, bad hands, text, error, missing fingers, extra digit, fewer digits, cropped, worst quality, low quality, normal quality, jpeg artifacts
Or:
lowres, bad anatomy, bad hands, text, error, missing fingers, extra digit, fewer digits, cropped, worst quality, low quality, normal quality, jpeg artifacts,signature, watermark, username, blurry, artist name, futanari, girl with penis, blood, urine, fat, obese, multiple girls, lowres, text, error, missing fingers, extra digit, fewer digits, cropped, worst quality, low quality, jpeg artifacts, signature, watermark, extra fingers, mutated hands, (multiple penises), (disembodied), (poorly drawn hands), (poorly drawn face), (mutation), (deformed breasts), (ugly), blurry, (bad anatomy), (bad proportions), (extra limbs), animal ears, extra ears, ((pubic hair)), ((fat)), obese, (ribbon), realistic eyes
You can basically do it all together, but there’s a lot of repetition.
The first field is controlled by commands, you can read the syntax separately, but the basic rules are as follows:
- The network reacts to capslock (slightly, especially clearly visible at low resolutions: suppose without a capslok, a curved shadow was present, and with a capslok it was fixed).
- The network ranks keywords by comment symbols and their number, that is, to get a more accurate result, you need to write something like (photorealistic)) (small) shit. Values in parentheses ( ) increase their influence, values in parentheses [ ] reduce their influence. Instead of ( ) brackets, you can use { }.
- The position of the keyword affects the generation, so the most important thing is to kick at the beginning or comment with signs.
- You can comment on the commented.
- Duplicating the same keywords doesn’t give much of a result (I mean you’ll get about the same thing, but a little different visually, maybe better, maybe worse).
- You can use multiplayers – negative and positive – it is enough to write through a colon the number from 0 to 1 to reduce the influence, and the number from 1 to 2 (the number two is not recommended, most likely the network will break the image, the optimal maximum is 1.4-1.5) to increase the impact. Brought to you by Hackfreaks official. That is, let’s say you want narrow thighs, and the network draws you fat? Just write her a magnifying multiplayer narrow thighs:1.5.
In non-default models, multiplayers can be extended and eat values above 1.5, or below 0.1, that is, if you merge a lot of different things and for some reason your boobs with small chest: 1.2 do not decrease, then it may be worth prescribing small chest: 3.
1. You can write keywords separated by commas, then the network will try with each iteration to generate an additional one to the already prepared sequentially ranked. And you can write blocks of words in a row, then the network will generate each block comprehensively.
2. Articles don’t need to be written (but you can, especially if you write descriptions of environmentalism like in the morning forest near the city). If you want BREAST WITH A BIG NIPPLE, write simply BREAST BIG NIPPLE or BREAST WITH BIG NIPPLE, remember that a more specific query is a better result.
3. You can write multipart queries without spaces, such as SMALLSIZE, 1girl, and so on. Often gives the best result.
4. There is a suitable AND team, combine different separate things with it, for example, instead of naked body, naked breasts, big ass, write naked female body with naked breasts AND big ass (attention, the duration of generation increases in proportion to the number of AND in the prompt).
5. You can use the | sign as a condition separator. let’s say there is:
a busy city street in a modern city|illustration|cinematic lighting

Basic example: there is a photo, there is a pull, it needs to be undressed. What to write? That’s right: nude body, nude breasts.
Yes, this command is enough to completely undress almost any photo.
On the left is a large field, there throw basic images that you will mock. On the right is the output image of the neural network. Under it there are four buttons: copy clearly, img2img throws into the img2img tab, send tu inpeint returns the result to the left window for further generation, extras – throws the image to upscalers.
Under the field where the base image is thrown there is a level of blurring of the mask – the more blurring, the more passing objects the mask will touch and the better (or worse) the mask-based generated will lie, the less blurring, the less additional objects the mask will touch and its effect will occur more on the black selection, often with minimal values the gradation between the mask and the main image is visible, but it can be removed. Experiment.
Then the Draw mask and Upload mask buttons, in fact everything is clear.
Also masks do not have to draw exactly on the contour of the object, on the contrary, it is better to go BEYOND the contour.
Inpaint masked/unmasked without comments.
Masked content:
Fill – generation from scratch based on values from the first field from above, to a small extent the use of the basic figure in the image. In order not to get artifacts with a ready-made photo, you twist Denoising strength by 1.
Original – the base image is taken as a basis. Blending with the main figure is regulated through Denoising strength.
Latent noise and Latent nothing are mainly for removing small parts and artifacts on ready-made iterations.
Inpaint at full resolution – enlarges the mask area, processes, reduces, places back in place of the mask, in short – for extra detail, check mark
Inpaint at full resolution padding, pixels – affects the checkbox above, gives AI information about objects outside the mask at a specified pixel distance for more accurate generation, a very useful thing, allows you to make correct generations if the mask does not go beyond the object, for example, in clothes (generate a neckline, for example, or a cut of a dress in front of the chest to the waist), well, to generate any shit in the image correctly.
Then the types of recycling. Most of the time you will use Just resize.
Sampling Steps – the number of passes, directly affects the time and quality of generation.
Sampling method – here it is a long time to write about each method, well, in general there are both simpler and faster, and more realistic and complex. Everyone is on the same seat and decide which one is best for you. For test runs, more than 10-20 iterations are usually not needed. For clarity:

Width and Height – width and height, for the correct operation of the grid you need to adjust to the proportions of the original image. Keep in mind that the network does not work correctly with particularly low resolutions, it is better to put from 256 pixels on the short side, in extreme cases 192 just test quickly.
- ATTENTION, if you have a TOP card, then you do not need to put more than 768 pixels on the long side, and if the middle and below – do not put more than 512. This makes no sense, all suitable images can be upscale after generation at least in 4K using a neuron. It is better instead of a large resolution to put more generation steps.
Restore faces – a useful feature fixing faces and curved eyes, downloads plugins when using, there are two types of recovery, each can be selected in Settings – Face restoration.
Tiling – create seamless textures, you don’t need to.
Batch size – how many images will be created in one pass, batch count – how many passes there will be. What’s the difference? In the consumption of video memory. If you don’t have much of it, then it’s better to spin Batch count for multiple generation.
CFG Scale – balancing between BEST QUALITY (left) and SATISFACTION OF KEYWORDS (right). You’re going to spin all the time. Balancing is constantly moving depending on the model, so if in one model the perfect point is 3.5, then in the other there will be a pussy most likely.
Denoising strength – another twister that you will constantly twist, this is a karoche type of mixer, determines how much the neural network will rely on the base image.Application: narlil suitable in appearance boobs, but they are anime? No problem, choose the diffusion force 0.5 and the roller realistic on top of them.
Seed – seed value, anchor point of generation. Since neural networks randomize, it is not always possible to get the right one, that’s why there are cidphrases for such situations – to remember a suitable sidphrase from which a suitable result was obtained so that the grid walked around it and did not squint it much. All sidphrases are written on the bottom right under the generated photo. Also for different models you can stuff other people’s seed phrases stable on all AIBooru.
In the Extra tab, a piece for more randomization and brute force:
Variation Seed is an add-on under Seed that adds another version of the seed for new generation without changing the main led. Variation strength regulates the degree of influence of the new seed. Led recycles change the height and width of the led variety.
At the top there is also a Settings tab, as mentioned earlier from there you only need to restore the face, but there are two more options needed:
- Eta noise seed delta, it can of course not be exposed, but for example novelAI led noise is defined and is 31337.
- Apply color correction to img2img results to match original colors, does not always work correctly.
The process itself for very lazy novokeks in this topic in 5 seconds
Go to the settings and enable the option “Apply color correction to img2img results to match original colors” why, from the name it is clear. If during generation there are obvious overlights or underlights, then disable back Apply color correction to img2img results to match original colors (in the example below you need to be in the off state just in time).
Upon completion of the installation, you immediately take a photo from here:
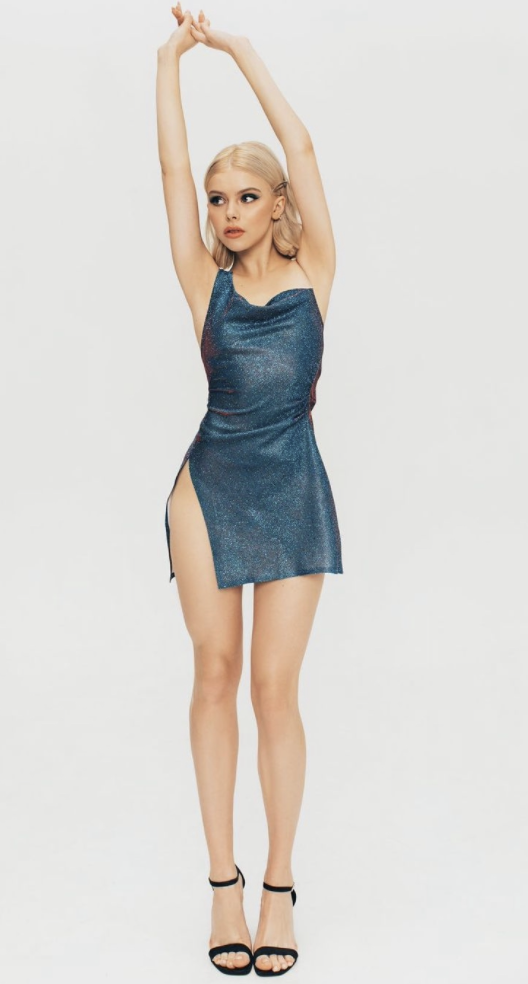
You configure the neural network like this:

The keywords in the second field are written higher in the text.

Next, click Generate and, if you did everything right, you will get something similar to this (perhaps in shorts, it depends on how you draw the mask):
Then you can experiment with sliders, values, change sampling modes, plow other people’s values, write all sorts of forbidden things, run the same file 300 times using the past as a reference to clarify the quality, and so on. There is no point in painting.
All your generations are not deleted anywhere, but carefully stored in the folder SD\stable-diffusion-webui\outputs.
That’s it, welcome to the world of terabytes of generative hornet content!

